Returning my iPad

2016-02-26_17_02_04-676x507


Have you already handed in your old iPad? Then you may want to set up your new iPad or log in using your School Apple ID

Occasionally, you will need to return your iPad to IT Support in order to swap it for a newer model or if you are leaving the School.

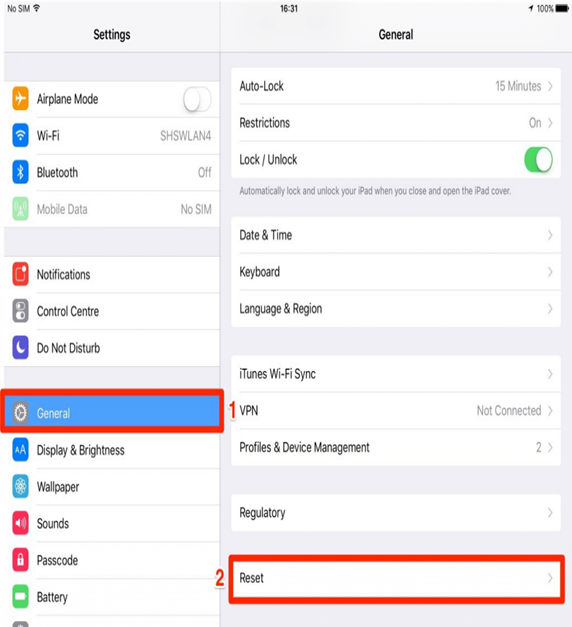
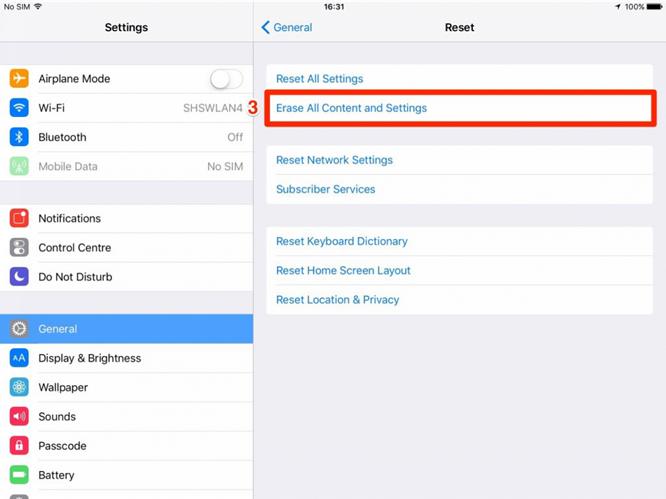
Below are some instructions that you must follow before returning your iPad to IT Support. Please do not assume you can do this on the day in the IT Support office.

What information do I need?

1328715264807_7278404You will need to have the following information handy:

  • Your iPad’s pass code
  • Your Apple ID (this is an email address. If you followed our instructions two years ago, this should be your School email address)
  • Your Apple ID password (If you have forgotten your Apple ID password, it can be recovered here)

What do I need to do?

There are four main things that you need to do:

  1. Back up your data
  2. Turn off the Find my iPad feature
  3. Reset your iPad
  4. Return your iPad with its case, its USB power adapter and its USB charging cable (see main illustration, above) as instructed by your Head of Year. 

We’ll look at each of these steps in more detail below.

1. Back up your data

i-tried-to-log-in-on-my-ipad-turns-out-it-was-an-etch-a-sketch-and-i-dont-own-an-ipad-also-im-out-of-wine-a32f4
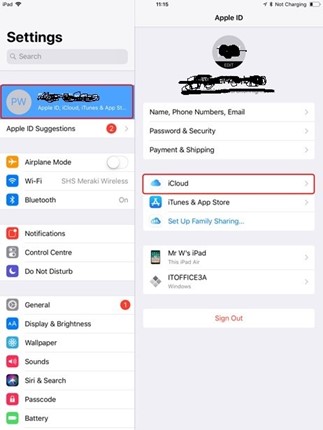
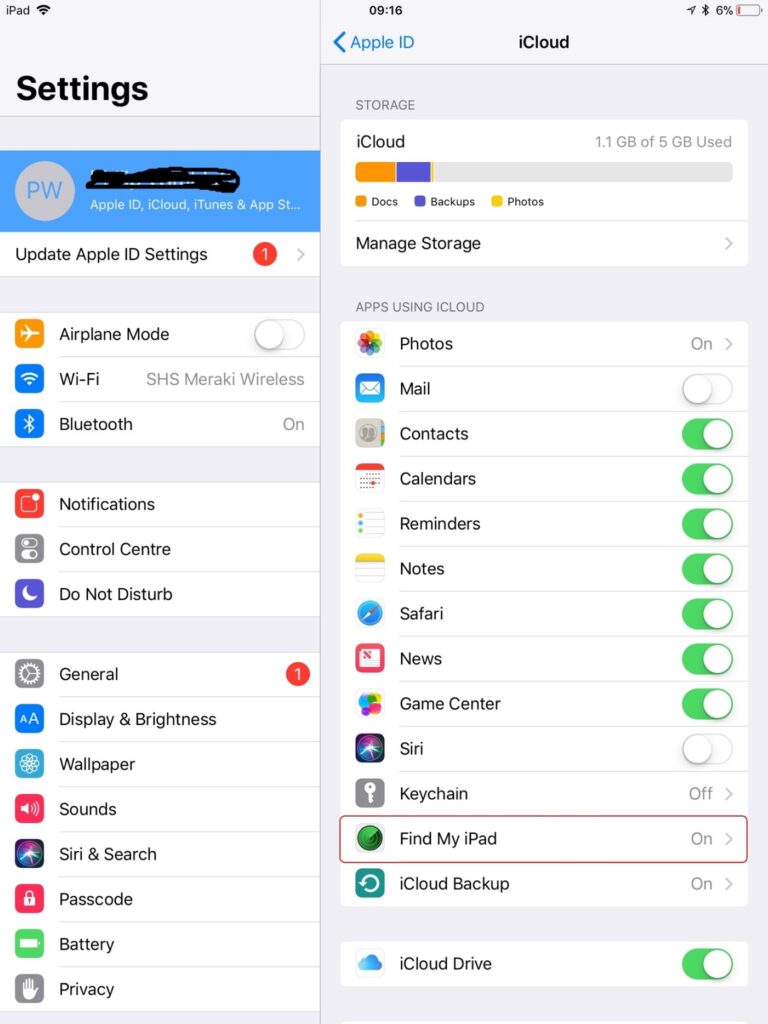
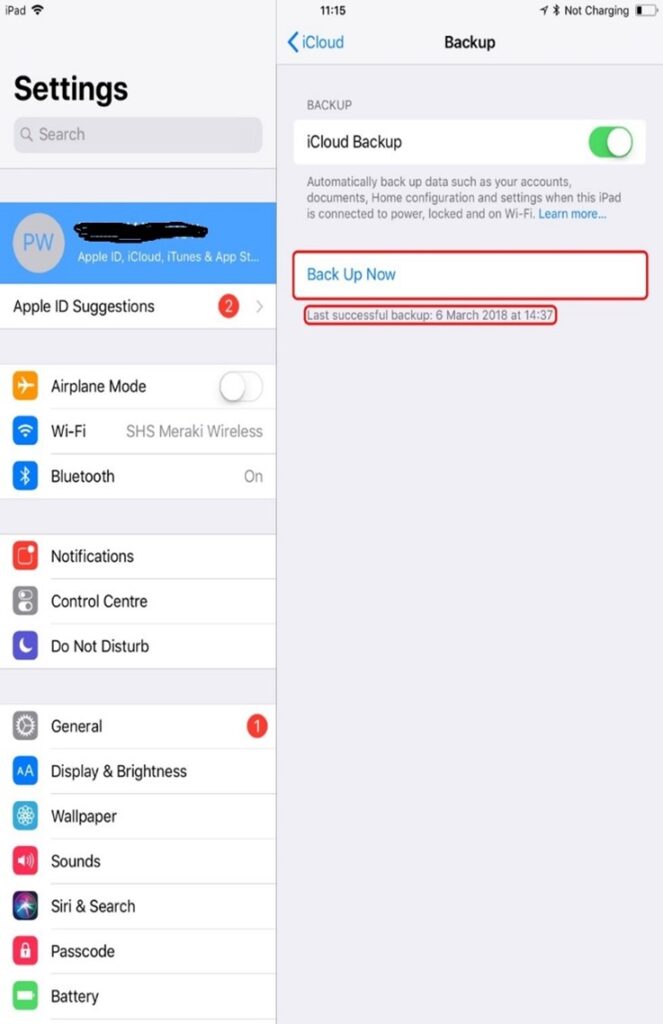
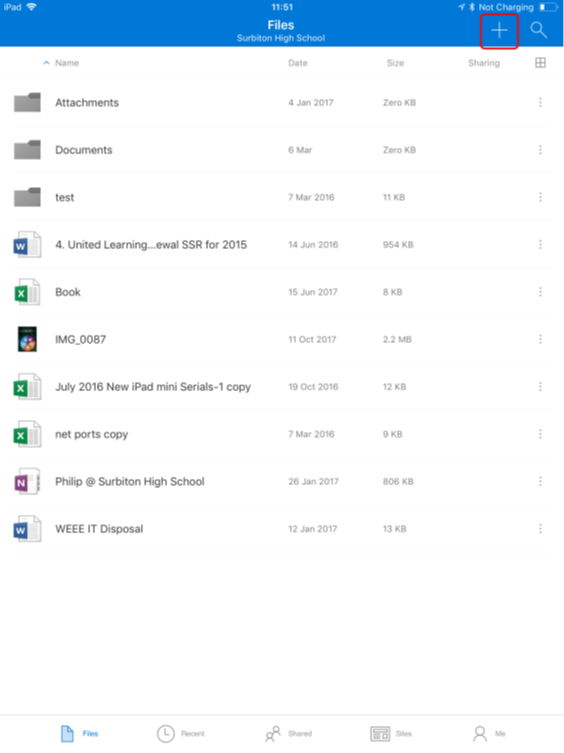
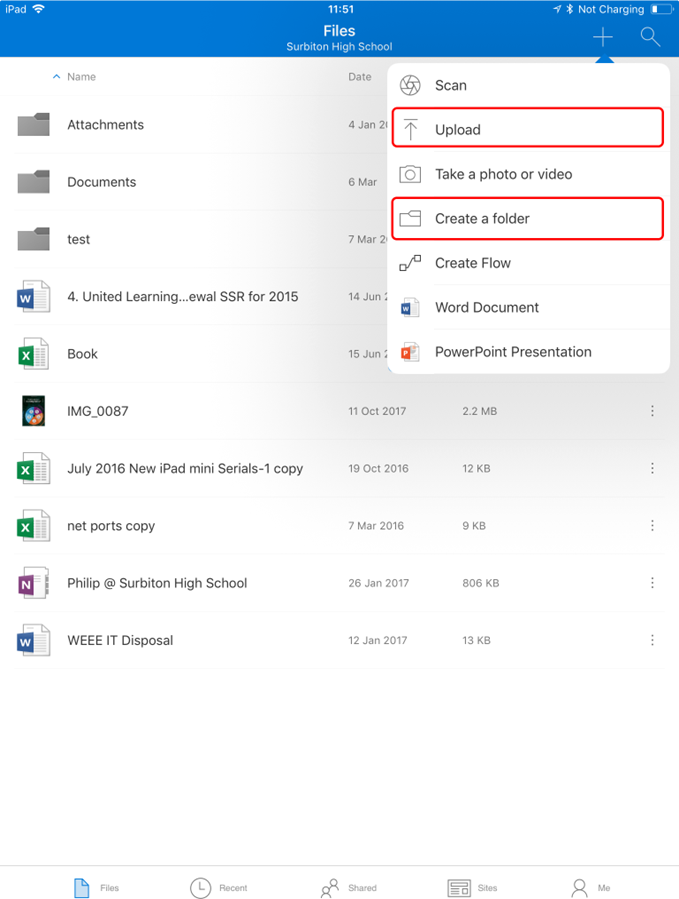
Backing up the data in your iPad is essential. This will ensure that all your data and settings can be transferred seamlessly to your new iPad when you receive it. The kind of back-up that you need will depend on the size of the files (photographs, documents, videos…) that you have stored in your iPad. If you are leaving the School, your data remains yours and can be backed up to a new device.

Backing up to iCloud

Please follow the instructions in the photograph below to activate your iCloud back-up (it may be that you have wisely done this already, in which case no action is required at this point).

iCloud back up will back up all your settings but it can only back up to 5 gigabytes (5GB) of data altogether. This means that if you have more than 5GB of data (easily done if you have lots of photos and videos), you will need to make alternative arrangements to ensure this data is not erased… FOREVER! The next steps show you what you need to do if this is the case for you. Of course, it may be that simply deleting most of the photos is the easiest thing to do.

Backing up to your desktop or laptop at School

MjAxMy05YTVlYjViNjZlMjk3NzI4_5236f7e52ffccA little known fact is that you can transfer data from your iPad to your desktop or laptop at School simply by connecting your iPad to your PC using your USB charging cable. Your PC will read the iPad as an external storage device (select Trust on your iPad screen when prompted) and you will be able to copy data from your iPad and paste it into a folder in your PC.

Backing up to OneDrive

This is the wireless option. If you haven’t activated OneDrive already, then you should follow this link (scroll down) to read about Office 365 features, including OneDrive. Follow the instructions there. Then download the OneDrive app from the Appstore.

If you are already using OneDrive, then simply create a new folder to import all your photos (or other data) as per the instructions in the photographs below.

Important note: If you are leaving the School, you will cease to have access to your School OneDrive after approximately one term, so please ensure you have backed up your data elsewhere if this is the case.

Backing up to iTunes

iTunes_-_Everything_you_need_to_be_entertained__-_Apple

A third and comprehensive way to ensure your iPad is completely and utterly backed up and that you can restore all of its data seamlessly to a new iPad is to use iTunes, a free programme that you can download from the Apple website – it has Mac and PC versions.

If you decide to do it this way, you will need to download and install iTunes on your own  desktop or laptop (i.e. not a School machine), connect your iPad to the computer using the USB charging cable and follow the on screen instructions to perform a full back-up.

If you opt for this, once the back-up and restore process is complete, you will then need to delete the back-up that you created from your computer for safe-guarding reasons. If you would rather not do this, you do not have to. Simply complete the other steps in this section.

After backing up in iTunes: Please note that the operating system installed in the new iPad may be an older version. When restoring from iTunes, you will need to set up as new, upgrade your operating system on the iPad and then restore with iTunes.

2. Turn off the Find my iPad feature

Please complete this step immediately before step number 3, below. No sooner. This will ensure that you can transfer this feature to your new iPad and that your old iPad can be used by someone else. It is very important that you do this, see below.

3. Reset your iPad

Only do this when you are absolutely sure that you have backed up all your data and you are ready to return your iPad to IT Support. Once you do this, there is no way back!

Resetting your iPad is very straight forward. The pictures below highlight the steps you need to take.

IMG_0898IMG_0899

4. Return you iPad to IT Support

Unless specific instructions have been given to you by your Head of Year, please return your iPad, in its case, together with its USB charging cable and USB power adapter to IT Support in Charles Burney House. As explained previously, the power adapter and its cable also need to be returned by this deadline, so, if you have lost or misplaced them, you will need to purchase replacements. Both Apple and Amazon sell them. Not acting now to find or replace these items if they are lost will cause a great deal of unnecessary administration to the School and any costs, including any financial penalties passed on to us by the lessor (the people from whom we rent the iPads) will be billed to your parents.